Arduino - PROGMEM Accessing 3 Dimensional Array Data Part 1
In this article we are going to build some animations for the 8x8x8 rgb led cube using the progmem flash memory
When we use the progmem array type we can store data in flash (program) memory instead of SRAM. There's a description of the various types of memory available on an Arduino board.The PROGMEM keyword is a variable modifier, it should be used only with the datatypes defined in pgmspace.h. It tells the compiler "put this information into flash memory", instead of into SRAM, where it would normally go. PROGMEM is part of the pgmspace.h library. So you first need to include the library at the top your sketch, like this: #include <avr/pgmspace.h>. The datatype for this case is accessing data for a specific led in the cube. For this animation we are going to display "I 🖤 U" going around inside the cube. First we build the arrays using progmem to shape the symbols. The instruction parameters for these arrays will be ArrayName[how many frames][symbol shape][accessing led position]. There are many different ways to use the progmem, but in this article I'm going to get all the details involving that. The arrays is setup on the sketch before the setup function normally.
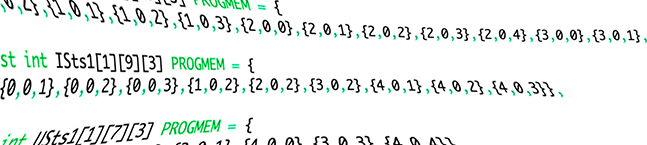
const int ISts1[1][9][3] PROGMEM = {
  {{0,0,1},{0,0,2},{0,0,3},{1,0,2},{2,0,2},{3,0,2},{4,0,1},{4,0,2},{4,0,3}},
};
const int heartSts1[1][16][3] PROGMEM = {
  {{0,0,2},{1,0,1},{1,0,2},{1,0,3},{2,0,0},{2,0,1},{2,0,2},{2,0,3},{2,0,4},{3,0,0},{3,0,1},{3,0,3},{3,0,4},{3,0,2},{4,0,1},{4,0,3}},
};
const int USts1[1][10][3] PROGMEM = {
  {{0,0,1},{0,0,2},{1,0,0},{1,0,3},{2,0,0},{2,0,3},{3,0,0},{3,0,3},{4,0,0},{4,0,3}},
};
Above we have the three arrays we need, again the name of the arrays can be anything in my case is ISts1, heartSts1 and USts1. The square brackets are the groups of data, which you can see the first is how many lines of data, the second is how many group of data on the line and third how many data in each group. The data we are going to manipulate here is like this. The LED() function on the cube takes six arguments, the first three are related to the x,y,z which on the for loop is the i,j,k. that means planes, rows and columns. The other three are the r,g,b colors which we will leave that for later. So the numbers on each group for example {0,0,0} stands for the very first led on the cube, and {7,7,7} stands for the very last led on the cube. In this case all the three symbols start from the first row, notice the middle number they are all 0 which is the first row. The idea is to rotate around the cube and come back to the start point, and all on the same plane. Since we don't have to deal with the planes of the symbols, we just have to increase decrease the columns and increase decrease the rows going around. To do all these we use the for loops with variables carrying the values to do the actions.
void pattern_I(){
  int mydata,mydata1,mydata2,t=100,jj=16,jjj=0;
  for(int ii=0; ii<20; ii++){
    for(int i=0; i<1; i++){
      for(int j=0,jj=18,jjj=0; j<9,jj>0,jjj<18; j++,jj--,jjj++){
        for(int k=0; k<3; k++){
         if(k==0){ mydata = pgm_read_byte(&ISts1[i][j][k]);}
         if(k==1){ mydata1 = pgm_read_byte(&ISts1[i][j][k]);}
         if(k==2){ mydata2 = pgm_read_byte(&ISts1[i][j][k]);}
         if(ii==1){mydata2++;}
         if(ii==2){mydata2=mydata2+2;}
         if(ii==3){mydata2=mydata2+3;}
         if(ii==4){mydata1=1;mydata2=mydata2+3;}
         if(ii==5){mydata1=mydata1+1;mydata2=mydata2+3;}
         if(ii==6){mydata1=+3;mydata2=mydata2+3;}
         if(ii==7){mydata1=+4;mydata2=mydata2+3;}
         if(ii==8){mydata1=+5;mydata2=mydata2+3;}
         if(ii==9){mydata1=+6;mydata2=mydata2+3;}
         if(ii==10){mydata1=+7;mydata2=mydata2+3;}
         if(ii==11){mydata1=+7;mydata2=mydata2+2;}
         if(ii==12){mydata1=+7;mydata2=mydata2+1;}
         if(ii==13){mydata1=+7;}
         if(ii==14){mydata1=+6;}
         if(ii==15){mydata1=+5;}
         if(ii==16){mydata1=+4;}
         if(ii==17){mydata1=+3;}
         if(ii==18){mydata1=+2;}
         if(ii==19){mydata1=+1;}
        }
        LED(mydata,mydata1,mydata2,jj,0,jjj);
      jj=jj-1,jjj=jjj+1;
      }
    }
    delay(t);
    clean();
  }
}
Above is the function for the letter "I". First we declare the variables we need in this case mydata,mydata1,mydata2 will be the variables carrying the values from the arrays and have them change with the loops. The "t" is how fast we like to play each frame and the "jj" , "jjj" are related to the r,g,b color. So the first loop is how many frames it took for the "I" to go around the cube, 20. The second loop is related to the how many lines of groups I have in the array,[1]. The third loop is related to how many groups to create the symbol, [9] and the color red going to green. The forth loop is related to the x,y,z(plane,column,row). So the arduino reads a byte one at the time. So the loop going three times we have the variables with the values and that is the start point. After three times it leaves this loop and comes down to the LED(mydata,mydata1,mydata2...) function and display. Then the alter loop of 20 goes around again but this time the if statements "i==..." compares each frame and each time we manipulate the columns and rows variables going around the cube. Bellow are the other two functions "heart" and "U", which are the same as the "I" function and the only difference are the size of the arrays.
void patternSetheart(){
  int mydata,mydata1,mydata2,t=100;
  for(int ii=0; ii<20; ii++){
    for(int i=0; i<1; i++){
      for(int j=0,jj=16,jjj=0; j<16,jj>0,jjj<16; j++,jj--,jjj++){
        for(int k=0; k<3; k++){
         if(k==0){ mydata = pgm_read_byte(&heartSts1[i][j][k]);}
         if(k==1){ mydata1 = pgm_read_byte(&heartSts1[i][j][k]);}
         if(k==2){ mydata2 = pgm_read_byte(&heartSts1[i][j][k]);}
         if(ii==1){mydata2++;}
         if(ii==2){mydata2=mydata2+2;}
         if(ii==3){mydata2=mydata2+3;}
         if(ii==4){mydata1=1;mydata2=mydata2+3;}
         if(ii==5){mydata1=mydata1+1;mydata2=mydata2+3;}
         if(ii==6){mydata1=+3;mydata2=mydata2+3;}
         if(ii==7){mydata1=+4;mydata2=mydata2+3;}
         if(ii==8){mydata1=+5;mydata2=mydata2+3;}
         if(ii==9){mydata1=+6;mydata2=mydata2+3;}
         if(ii==10){mydata1=+7;mydata2=mydata2+3;}
         if(ii==11){mydata1=+7;mydata2=mydata2+2;}
         if(ii==12){mydata1=+7;mydata2=mydata2+1;}
         if(ii==13){mydata1=+7;}
         if(ii==14){mydata1=+6;}
         if(ii==15){mydata1=+5;}
         if(ii==16){mydata1=+4;}
         if(ii==17){mydata1=+3;}
         if(ii==18){mydata1=+2;}
         if(ii==19){mydata1=+1;}
        }
        LED(mydata,mydata1,mydata2,jj,0,jjj);
      }
    }
    delay(t);
    clean();
  }
}
void patternSetU(){
  int mydata,mydata1,mydata2,t=100;
  for(int ii=0; ii<20; ii++){
    for(int i=0; i<1; i++){
      for(int j=0,jj=20,jjj=0; j<10,jj>0,jjj<20; j++,jj--,jjj++){
        for(int k=0; k<3; k++){
         if(k==0){ mydata = pgm_read_byte(&USts1[i][j][k]);}
         if(k==1){ mydata1 = pgm_read_byte(&USts1[i][j][k]);}
         if(k==2){ mydata2 = pgm_read_byte(&USts1[i][j][k]);}
         if(ii==1){mydata2++;}
         if(ii==2){mydata2=mydata2+2;}
         if(ii==3){mydata2=mydata2+3;}
         if(ii==4){mydata1=1;mydata2=mydata2+3;}
         if(ii==5){mydata1=mydata1+1;mydata2=mydata2+3;}
         if(ii==6){mydata1=+3;mydata2=mydata2+3;}
         if(ii==7){mydata1=+4;mydata2=mydata2+3;}
         if(ii==8){mydata1=+5;mydata2=mydata2+3;}
         if(ii==9){mydata1=+6;mydata2=mydata2+3;}
         if(ii==10){mydata1=+7;mydata2=mydata2+3;}
         if(ii==11){mydata1=+7;mydata2=mydata2+2;}
         if(ii==12){mydata1=+7;mydata2=mydata2+1;}
         if(ii==13){mydata1=+7;}
         if(ii==14){mydata1=+6;}
         if(ii==15){mydata1=+5;}
         if(ii==16){mydata1=+4;}
         if(ii==17){mydata1=+3;}
         if(ii==18){mydata1=+2;}
         if(ii==19){mydata1=+1;}
        }
        LED(mydata,mydata1,mydata2,jj,0,jjj);
      jj=jj-1,jjj=jjj+1;
      }
    }
    delay(t);
    clean();
  }
}
This animation I tested on my very first 8x8x8 rgb led cube which is full of green led ghost. The colors for this animation I did a transition between red and blue inside the "j" loop, by adding two more variables and at the end of the loop by adding +1 -1 on top of it to match the size of the loop.
CONCLUSION:
The PROGMEM flash memory is a wonderful tool and it saves you a lot SRAM from your microcontroller, but at the same time is not that easy to use it. I still can not manage to display bytes from a ASCII array table, there are a quite a few samples online but not very many apply for rgb led cube. Here is something for future projects.